What is this page about? Basically its purpose is to show the basic parts of a refractor telescope. This page may be of help to those just starting out (or for those who have obtained a refractor scope with no manual), etc.
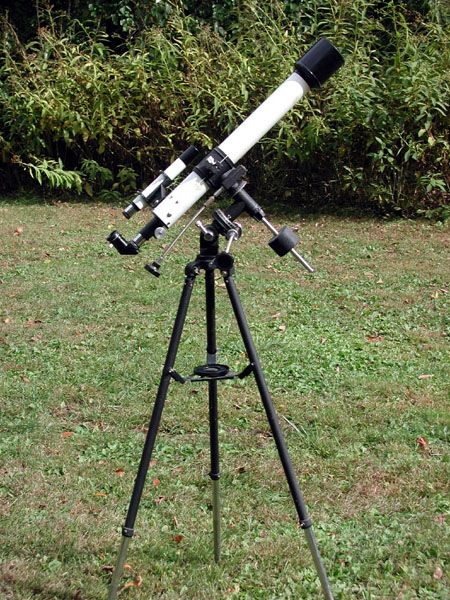
Here is a photo of a typical equatorial refractor telescope. This scope is an old (early 1970s vintage) Tasco refractor (this was back when they were made with some degree of quality). Just about everything on this telescope is metal or glass (very little plastic unlike what is found in today's entry level scopes).
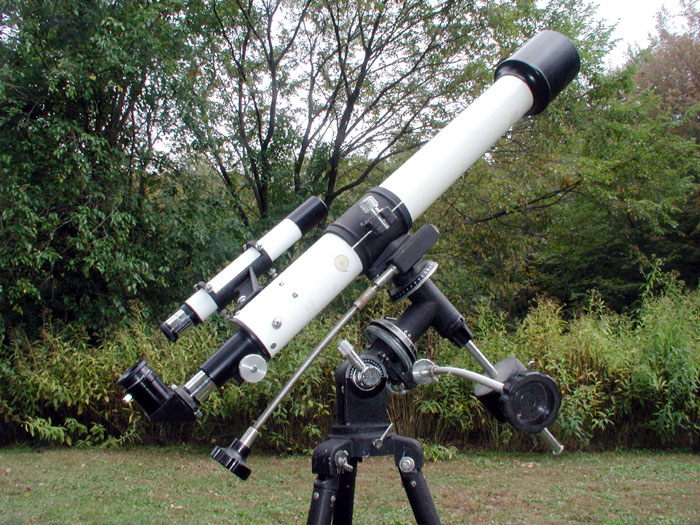
Here's another view, a little closer Subsequent photos will show more of the individual components of the scope.
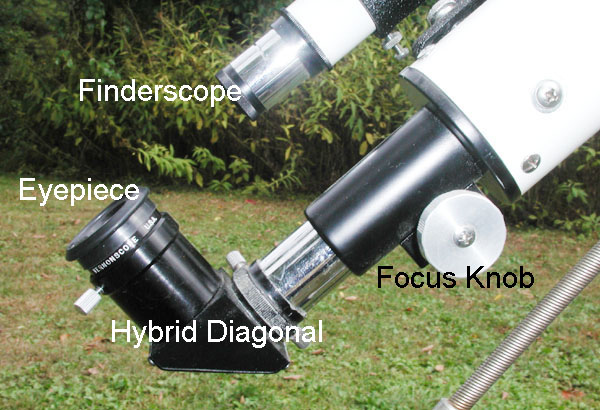
This photo shows the observer end of the telescope. The main items here are the star diagonal (this scope has what is known as a "hybrid diagonal". A hybrid diagonal accepts 1.25" diameter eyepieces but it plugs into a focuser that accepts 0.965" eyepieces. The ability of a scope to accept 1.25" eyepieces is highly desirable for a number of reasons. First, there are very few eyepieces made in the .965" size these days. Beyond that, the types of eyepieces available in .965" size is very limited, and they tend to be of lower quality. The 1.25" diameter eyepieces are the standard today, and a great variety of types and focal lengths are available and quality ranges from acceptable to outstanding. If you have an older scope that has a diagonal that only accepts .965" eyepieces, the solution is to get a hybrid diagonal (about $40). The other items shown in this photo are the focusing knobs and part of the finderscope. This scope has machined metal focusing knobs, on modern entry level refractors they are almost all plastic.
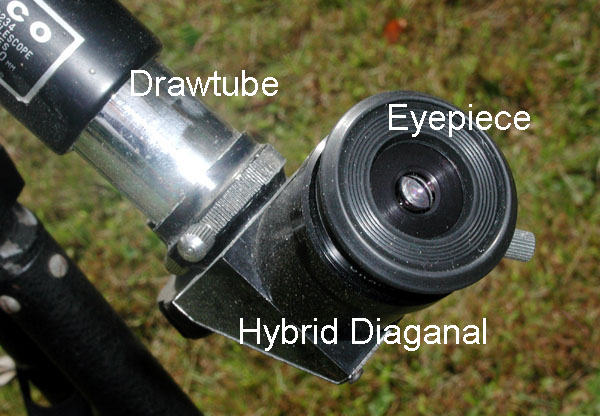
This photo shows the components above but at a slightly different angle. The drawtube is the part of the scope that moves in and out when the focusing knobs are rotated.
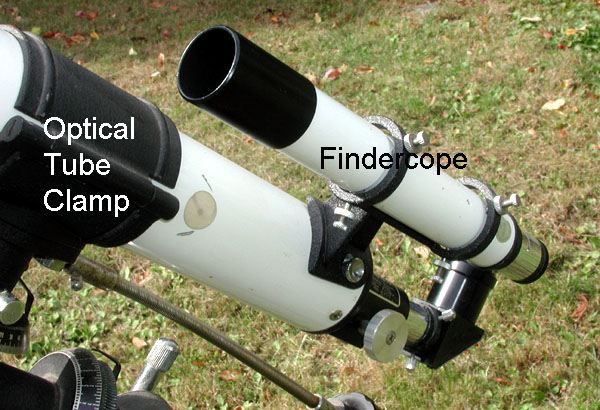
This image shows the finderscope and the optical tube clamp. The finderscope on this telescope is a 6x30 model, this is an upgrade I did years ago. Most of the time scopes of this class come with a smaller 5x24 finder, and quite often the finder bracket only has 3 locking screws instead of six like on this one (superior). The finderscope shown here is a quality unit. The optical tube clamp basically holds the telescope tube in the mount. It allows the tube to be rotated or moved forward or backward (to allow balancing) if necessary.
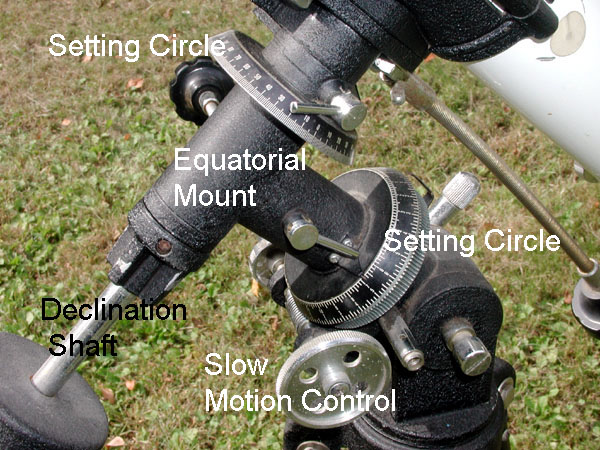
This photo shows the equatorial mounting of the telescope. Several main components are shown. The equatorial mount, when properly set up, allows the telescope to follow the stars more easily as compared to an alt-azimuth mount (technically speaking the stars are not moving, however they appear to move due to the rotation of the Earth). The mount has two axis, right ascension and declination. To track the stars, one only has to move the scope in the right ascension axis (whereas with an Alt-Azimuth mount one has to move two axis). Also shown are two setting circles. Any scope with an equatorial mount will have these circles. When used properly, they allow the user to "dial in" an object to view (by moving the scope so that the pointers match the coordinates of an object to be desired). The coordinates for objects to be observed can be obtained from most any star atlas. Setting circles do work, however the mount has to be level and aligned to the pole; typically the object to be observed will land within or near the field of low power eyepiece. It really depends on how carefully one sets up the scope and how carefully one dials in the object. Scopes with smaller (physically) setting circles will be less accurate than those with larger circles (larger circles allow finer graduations). The low motion control shown here is for right ascension; turning this wheel will allow smooth tracking of objects as they appear to move. This is very handy to have for higher magnifications (> 100x).
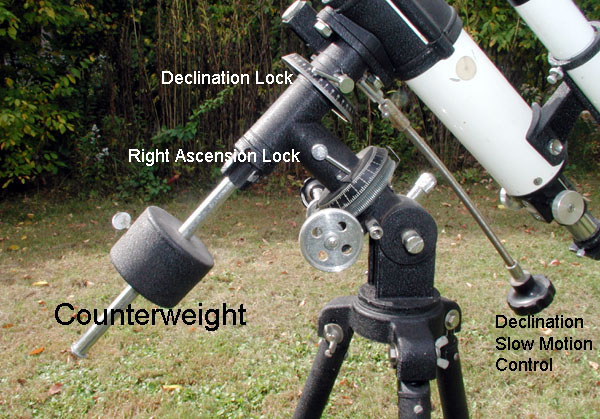
Here's another view of the equatorial mount. Note that each axis has a locking clamp; these lock the position of the optical tube once an object has been located for viewing. The counterweight is used to balanced the weight of the optical tube (a well balanced mount will allow much smoother operation and better tracking). This view also shows the declination slow motion control. This allows the scope's position to be finely adjusted in declination (very handy for centering up the object to be viewed once it has been acquired in the eyepiece). Not all equatorial scopes will have slow motion controls, however they are very handy to have. Some scopes will have electronic versions.
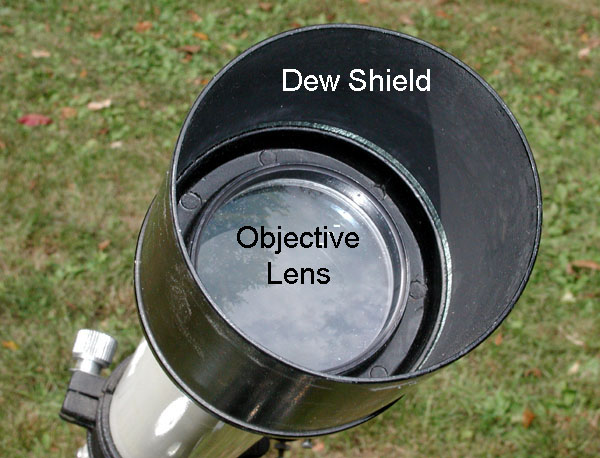
This view shows the most fundamental component of a refractor telescope: the objective lens. You know you have a refractor telescope if it has a lens up front (a lens with no center obstruction). If your scope has a mirror at the back, it is a reflector. Also shown here is the dew shield. This slows the formation of dew on the lens and allows longer viewing. Regarding the objective: you should NOT take it apart to clean it! The lenses on most entry level scopes are known as achromats, that is, they have 2 elements. DO NOT take these apart! They are lined up (in rotational position) at the factory for the best image, and if you take it apart and forget to mark it chances are it will not go back together in the proper orientation. The odds of crud getting in between the two optical components are slim, so there is no need to disassemble the objective. The only surface that should ever need cleaning (and this should only be occasional cleaning) is the portion of the objective that faces the sky. Not shown here is a lens cap, this should always be in place when the scope is not in use.
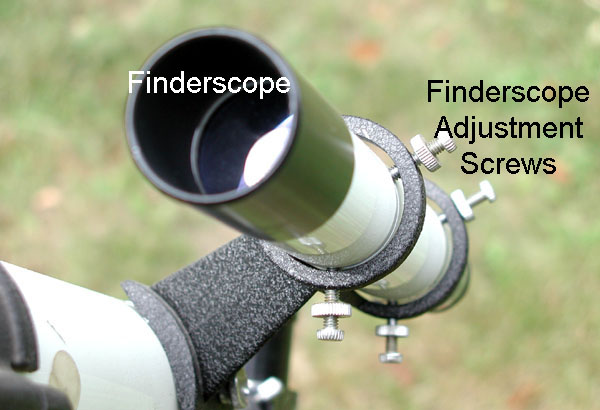
Here's a close up of the finderscope. As mentioned, this finder is probably better than the finder that will come on an entry level scope (this is a 6x30 finderscope vs. the typical 5x24 finder that comes with many scopes). The bracket that holds this finder has six locking screws that hold it in place. When the scope is initially put together, one has to align the finder to the main scope (using the screws). Once adjusted, it should stay pretty much in line. Some of the entry level scopes come with only a 3 point adjustment, a setup that is not as secure. The finderscope is like a sight on a gun; one locates the object to be observed on the crosshairs of the finderscope (and if properly aligned) the object will then be centered in the main telescope. Finding objects without a finderscope is very difficult due to the relatively small field of view of the main scope. A typical finderscope will have a field of view that is several degrees wide, wide enough to easily locate and center objects.
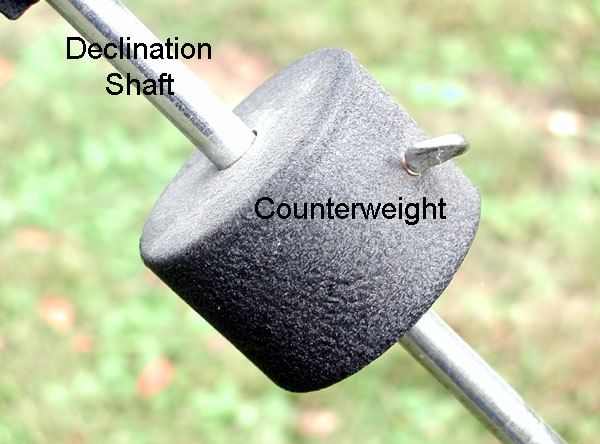
This photo shows a close up of the counterweight and declination shaft. The counterweight's position on the shaft is adjustable to allow fine balancing of the scope.
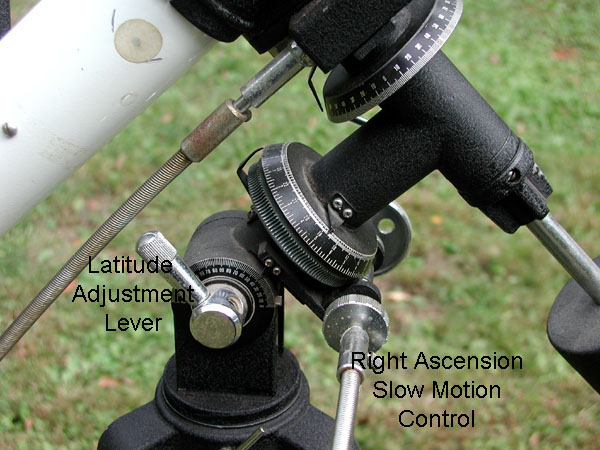
This photo shows another control of the equatorial mount, the latitude adjustment lever. When using an equatorial mount, one has to set it to the latitude of the observing site in order to allow the mount to accurately be able to track objects. In general this setting is made once (unless you take the scope a significant distance north or south of the normal observing location. Also shown is the other side of the right ascension slow motion control (the control extends out of the photo, it has a knob at the end).
Use your browser's "back" button, or use links below if you arrived here via some other path:
This page is part of the site Amateur Astronomer's Notebook.
E-mail to Joe
Roberts
Images and HTML text © Copyright 2007 by Joe Roberts. Please request permission to use
photos for purposes other than "personal use".